Clarifying Face Mask
$ 52.00
Soothing Spirulina Face Mask
$ 48.00
Multi-Masking: The Beauty Trend You Need Try
We have a new beauty trend you need to try! And here’s why.
Skin is always evolving and ever-changing (even on the same complexion), combination skin is more common than you may think and having a couple different conditions you want to focus on is completely normal.
Skin is beautiful and diverse and really does require individual care, which is why we always say we don’t believe in a one-size-fits-all philosophy when it comes to skincare – and why we’ve become obsessed with this beauty trend: MULTI-MASKING.
Sure you can use one mask for the entire face (we do it all the time!) but this fresh approach to applying masks can actually make a big difference in bringing balance back to your complexion. Customized skincare is where transformation and healing can really happen – and multi-masking is the best way to begin.
WHY MULTI-MASK
Are you prone to hormonal acne along the jawline but feeling tight/dry on your cheeks? Experiencing blackheads and congestion around the nose and chin but want to soften fine lines on your forehead? Wanting to calm redness and sensitive skin while still promoting a youthful glow?
Girl, us too.
While it’s important to pinpoint your skin’s natural tendencies to help you pick the most effective facial mask (prone to dry patches or to producing oil or to pigmentation), the reality is: skin is always changing – and categorizing your skin as a certain type can sometimes be limiting and even misleading. Your skin state can shift based on a variety of different external + internal factors such as climate, nutrition, stress, sleep, hormonal imbalances, genetics, medications, etc.
While we do our best to bring balance to our wellness within, this approach to masking helps to bring balance back to the surface. Multi-masking is a powerful way to help support the diverse, ever-evolving nature of your skin. By applying different masks to different areas of the skin, you’re able to specifically support unique skin needs – all at the same time.
HOW-TO MULTI-MASK
When it comes to masking, one and done isn’t always the answer. Depending on the day, the season, your monthly cycle or the special occasion, let your skin guide you in choosing the most supportive masks for your current skin state.
Here’s how to do it.
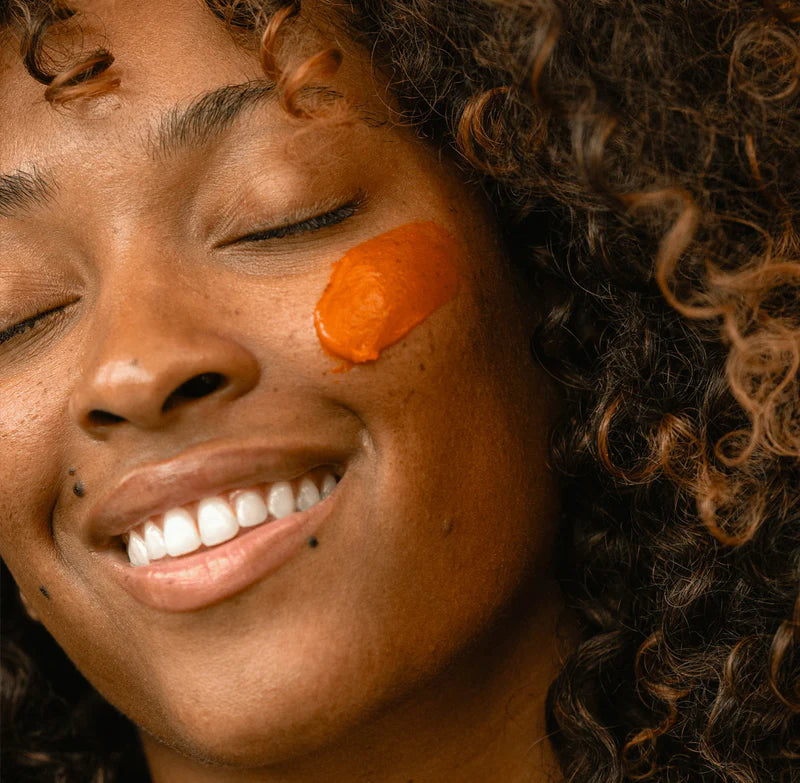
After cleansing, look closely at what you’re observing on the surface of your skin and start to reflect on what you’re seeing: Larger, more visible pores? Red, inflamed areas? Specific spots of hyperpigmentation? Healthy glow? Smile lines? Worry lines? Based on what you’re observing, you can opt for a clarifying mask, calming mask or hydrating mask! Below are even more tips for pinpointing your skin state and picking the most supportive masks:
Oil-rich/Acne-prone: Your skin is more prone to breakouts + inflammation, tends to produce excess oil and pore size is visibly larger on forehead, nose, chin and cheeks. Applying a clay-based, clarifying mask to these areas helps to sweep away dead/dull skin cells, draw out impurities, and purify pores. The mineral-rich clays in clarifying mask formulas also promote detoxification and absorb + balance excess oil production to reduce buildup and breakouts.
Sensitive/Damaged: Your skin tends to feel reactive, dry, sensitive or appear red + inflamed along with visible pore size varying across the face. Applying a more restorative facial mask creates a protective covering and provides immediate relief for inflammatory skin conditions. Soothing masks deeply nourish delicate skin and deliver concentrated calming herbs straight to the skin to help expedite the skin’s healing process.
Dry/Mature: Your skin tends to feel more tight, dry, sensitive or with signs of aging such as fine lines + hyperpigmentation along with less visible pores all over the face. Applying a nourishing facial mask can offer an immediate dose of skin-loving vitamins (like A and C) to promote collagen production and stimulate cell renewal to reveal a more vibrant, youthful complexion. Deeply hydrating ingredients infuse the skin with moisture, help to soften the look of the fine lines + signs of aging and promote a naturally plump appearance.
Apply a light layer of each specific mask to each specific area then sit back, relax and multi-mask!
Dry Regimen: The Works
$ 182.00
$ 218.00
Sensitive Regimen: The Works
$ 176.00
$ 210.00
Want to Create an At-Home Exfoliating Facial? We’ve Got Your Perfect Routine
As seasons change, it often feels like your skin needs a tweak with your routine. Our favorite practice to incorporate with summertime + warmer weather wrapping up?
Exfoliation.
But not just any exfoliation. We’re talking about exfoliating the face naturally + incorporating a full spa-like treatment. Our approach to exfoliation is definitely not the norm. No chemical peels or at-home microdermabrasion are involved.
An exfoliating facial is one of the best ways to reset as seasons change + encourage cell turnover and a glowing complexion.
But who says an at-home exfoliating facial can’t be as effective + relaxing as one you’d experience in a spa setting? You just need to know the right steps + products to use. ;) Plus, there’s the comfort + ease of fitting it into your routines when it works best for you.
Easy on the budget and easy on the brain, this handy guide will lay out an at-home exfoliating facial for you, step by step.
But first, let’s talk about all the benefits.
Benefits of an At-Home Exfoliating Facial
You know we’re all about an afternoon spent at a holistic spa. But when you can’t make it to the spa, there’s no reason you can’t bring it home.
If you’ve been around Primally Pure long, you know we love regular exfoliation. But with one important caveat. Exfoliating should be done in a gentle way that respects the delicate moisture barrier + integrity of the skin.
Many exfoliating facials – unless they’re exclusively holistic-focused – may include abrasive or chemical exfoliation. Often, this is too intense for the skin.
→ And even some holistic estheticians may overuse exfoliation, so be careful.
With that said, an at-home exfoliating facial is all about tuning into your skin and caring for it compassionately. Less is more with exfoliation. Contrary to popular belief – a rough scrub is NOT what your skin needs :)
Supports a Peaceful Mind + Healthy Body
A little at-home exfoliation facial helps more than your skin. It reminds you to slow down and practice the concept of self-health. Self-health means caring for yourself + your body so that you can show up more fully in life for the ones you love.
Taking time for yourself is proven to lower stress levels and increase self-compassion.1 A gentle, at-home exfoliating facial activates your parasympathetic activity + stimulates the vagus nerve. The gentle, rhythmic motion of exfoliating facial tools + products helps lower stress hormones. Give your spa session a boost by playing calming music.
But of course, we’d be remiss to not mention the skin benefits too.
Skin Benefits of an At-Home Exfoliating Facial
Besides the calming effects of an at-home exfoliating facial, you’re going to love how it positively impacts + rejuvenates your skin.
Here’s what an at-home exfoliating facial does for your skin:
Encourages cell turnover for decreased discoloration and radiant skin
Clears pores + visibly minimizes buildup (especially blackheads + stubborn milia)
Diminishes fine lines and wrinkles for a youthful appearance
Detoxifies skin tissue to help clear inflammation + irritation
Creates smoother skin + better product absorption (and better results)
Improves circulation, creating better blood flow to support a healthy glow
Opens pathways for lymphatic flow to deliver nutrients to areas that need healing
Brightens complexion by sloughing off dead skin cells
Builds a stronger skin barrier that protects + improves skin
Ready for a vibrant, youthful, and balanced complexion?
Here’s how to build out your personalized at-home exfoliating facial.
Build Your At-Home Exfoliating Facial Ritual
Get ready for a full-fledged relaxing + rejuvenating experience. Just because you’re at home doesn’t mean this ritual can’t be indulgent + soothing. ;)
1. Set the Vibe for a Memorable + Relaxing At-Home Exfoliating Facial
This is an important step – don’t skim over this!
Here’s how to create the perfect environment.
→ Put on your favorite playlist (we like to play this one in the spa for the benefits of nature on the nervous system)
→ Choose a room clear of clutter that feels peaceful (an at-home exfoliating facial doesn’t have to happen in your bathroom!)
→ Practice some deep breathing (try out nose breathing, it’s an excellent way to wind down and calm your mind)
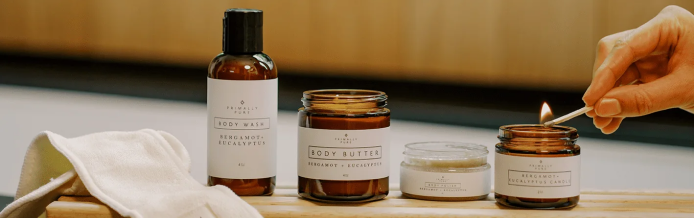
→ Light a candle to set the ambient mood with some juicy aromatherapy (we’re biased but you should try our non-toxic candles ;))
Setting the tone is so important! Now that you’re in the zen headspace, you’re ready to officially begin your at-home exfoliating facial experience.
2. Cleanse With a Gentle Cleansing Oil + Light Exfoliating Bar
Cleansing should be a mindful + rewarding experience. Washing your face might feel like a chore at the end of a long day. But when it’s part of your at-home exfoliating facial, it’s a totally different experience. ;)
Our cleansing oils feature the aromatherapy + medicinal properties of orange, lavender, geranium, and peppermint essential oils. But it’s also a multitasker, pampering your skin with nourishing oils like jojoba oil and pomegranate oil.
Here’s how to approach the cleansing step:
→ Take a couple of minutes to lovingly massage the cleansing oil into your skin.
Pay extra attention to any areas of tension or areas prone to breakouts + inflammation.
Tip: For many people, breakout-prone areas include the forehead, nose, or chin.
→ Hold a clean, warm washcloth directly to your skin until it cools. Let the warmth soak into your skin, softening skin texture + gently opening your pores. This step helps remove any excess oil/dirt. Once the washcloth is cool, you’re ready for the next step in cleansing.
→ Take a minute to double cleanse with a skin-specific gentle cleansing bar. Our clarifying bar is a great option for an at-home exfoliating facial. It provides light exfoliation without overwhelming the skin.
Feeling fuzzy on oil cleansing? Check out this oil cleansing tutorial.
Next up in your at-home exfoliating facial: one of our favorite gentle exfoliating facial tools: a facial dry brush.
3. Use a Facial Dry Brush to Exfoliate
Facial dry brushing is an easy + quick practice that awakens and invigorates your skin – while gently exfoliating. This step helps buff away dead skin cells and regenerate dull, lifeless skin.
But remember: always use light pressure. The goal is to provide gentle exfoliation + encourage lymphatic flow – not scrub!
Follow this path with your facial dry brush:
Start at the neck, stroking downward lightly 5-10x to encourage drainage from the lymphatic system.
Work upwards, starting at the jawline and moving from the center of your face to the hairline. Brush one side at a time.
Target areas you experience congestion, puffiness, or excess buildup. Similar to your cleansing oil, an at-home exfoliating facial is a great time to really tune into your skin. Intuitively focus on areas that need more attention. (And remember to always work around any active breakouts or flare-ups to help bring healing to the impacted area.)
When you’ve covered the whole face, finish with long upward strokes up the neck and the face. This encourages fresh flow + sends energy and nutrients back to the skin.
Feeling confused? Here’s a video tutorial from our holistic esthetician if you’re new to this exfoliating facial tool – it’s easy, promise!
Ready for what’s next? This is your time to sit back and do nothing while a nutrient-rich mask soaks in. And yes, it’s as good as it sounds. ;)
4. Time for a Facial Mask of Choice (Clarifying or Plumping)
After double cleansing and using your dry brush, you’re ready for the next step in your at-home exfoliation facial – a refining mask.
Depending on your skin state + preference, you can choose one of two options:
The Clarifying Mask: We love the clarifying mask for an at-home exfoliating facial because it contains two important ingredients:
White willow bark – a natural alternative to salicylic acid. It provides an added layer of gentle exfoliating without any sensitizing side effects.
Honey – provides enzymatic exfoliating while restoring moisture, balancing pH + sealing in nutrients. It even helps bring more oxygen to the skin by improving circulation in the facial tissues.
The Plumping Mask: If you’re looking for more moisture with your mask, this is your answer. It contains:
Bakuchiol – known as nature’s retinol, this ingredient is proven to work just as well as synthetic retinol products.
Honey – deeply nourishes and refines the skin. Just as we said above, we love how honey rejuvenates our skin.
*Tip: if you have combination skin, try out the multi-masking trend and pair two or more masks.
After applying, let it sit for 15-30 minutes. Sip a cup of herbal tea and catch up on your favorite novel or holistic health blog (like ours ;)). When you’re done, it’s time to prime your skin.
5. Spritz the Everything Spray
Now that you’ve completed the exfoliating portion of your at-home exfoliation facial, you’re ready to prep the skin for the day (or night) ahead.
The Everything Spray is our favorite – especially used after natural exfoliation. It contains powerful replenishing properties and an added layer of detoxifying and balancing. The star players are raw organic apple cider vinegar, aloe vera, and tea tree oil.
Spritz generously over the entire face and neck. You can also apply by pouring a bit on an organic cotton round and sweeping across your face, neck, and decollete.
Next up, let’s nourish and protect the newly revealed skin with a restorative last step.
6. Finish with Serum + Cream
Time for your final step in your at-home exfoliation facial: skin-specific serums + creams. Depending on your skin state, you’ll want to choose a pairing that supports your unique skin needs.
→ First, apply your serum and gently massage it into the skin (a little goes a long way). This is an important step to restore moisture with full-profile nutrients to complement your newly revealed skin.
→ Next, apply our skin-specific face creams for silky moisture that seals in and protects your skin’s moisture barrier.
*Tip: Add a final spray of facial mist to lock in even more moisture.
Take a deep, cleansing breath – your at-home exfoliation facial is complete!
How do you feel?
Whether you decide to return to your day or sink deeper into a relaxing practice is up to you. Just enjoy your fresh, glowing skin and refreshed _ grounded energy. :)
Remember: An At-Home Exfoliation Facial Is Accessible to You Any Time
Practicing the care + keeping of healthy, thriving skin is not only rewarding on a physical level, but an emotional one too. There’s something to be said for the deep relaxation of getting lost in the moment, listening to your skin intuitively + focusing inward for a pause.
We all deserve moments of peace sprinkled throughout our busy lives.
How can you take a moment to create a special spa-like experience for yourself? Try an at-home exfoliating facial like this one, or book an appointment with your holistic esthetician.
Whatever you choose, remember there’s always value in prioritizing yourself.
Inward and outward, it’s all connected. Make it count.
XO
Sources:
1. APA PsycNet | Teaching Self-Care to Caregivers: Effects of Mindfulness-Based Stress Reduction on the Mental Health of Therapists in Training
Pin your fav blow post below:
Our Holistic Esthetician Shares Her Secrets For An At-Home Facial
First of all, let me just say: facials are far from fluffy.
It’s not just about slapping on a sheet mask or focusing on superficial results. And in times when you’re feeling a bit off, stressed out or stuck at home, doing an at-home facial may be just the thing you need.
No matter what the day has held or what uncertainties lie ahead, creating space to reconnect with your skin + self through an at-home facial has a powerful ripple effect that impacts your soul and spirit as well – and I think we may need that now more than ever.
We have the privilege of providing facial treatments to our community at our very own holistic spa, The Spa at Primally Pure, and have seen firsthand the power that these experiences hold. Our guest’s demeanor drastically changes from when they first arrive (often feeling flustered or stressed) to when they leave – feeling heaviness + tension soften and returning to their day-to-day with a fresh sense of hope and healing.
See, facials are powerful stuff. 🙂
Alright, sweet friends, grab something nourishing to sip on and get cozy because I’m spilling all of my secrets to help you create a skin sanctuary in your very own home.
Facial Note: I’ve listed *a lot* of facial secrets below! But you can always simplify these steps if you’re tight on time – so to start, just try picking out at least 2 or 3 steps to follow for your at-home facial! This time is for you. With that said, I do want to encourage you to try to implement as many of these tips as possible to promote overall skin health and optimal wellness from within.
Here we go!
Create the mood
The very first step in cultivating a spa sanctuary at home is creating the mood.
Aromatherapy is key – diffuse either uplifting or calming essential oils (whatever you’re needing to feel in the moment, support your mind + mood with the appropriate aroma!). Try blue tansy, vetiver or lavender to relax your nervous system or lemongrass, bergamot or jasmine to lift your spirits. You can also burn a candle made with essential oils (remember to alwayssss avoid artificial fragrances) or light palo santo to clear your space and set the tone for a restorative at-home skin treatment.
You want to support all of your senses so pick a playlist that you can unwind to. For some people that may be rap (like our Founder, Bethany!), but for most of us, it may be something more soft and soothing. You can easily search your favorite music app for spa-like playlists or nature sounds to create the most relaxing atmosphere possible. I’m a big fan of nature sounds (I find mine from this app!), especially if you live in a city or are stuck indoors. 🙂
And of course, if we’re talking all things sensory and setting the tone, we can’t forget taste! Pour yourself a tall glass of water and infuse it with some fresh organic herbs, fruit or veg for the ultimate spa experience. Some of our favorite blends we use at The Spa at Primally Pure are: Orange + Rosemary, Lime + Mint, Strawberry + Basil, or Cucumber + Lemon. You can also brew a hot cup of herbal tea – for promoting serious skin health (sans caffeine, of course), try hibiscus + rose, roasted dandelion or peppermint. Plus the aroma + warmth of the tea helps you slow down and start to unwind.
Foot Soak
Okay, you might be wondering, a foot soak? In an at-home facial? I told you, I’m spilling all my facial secrets! And a facial is intended to support so. much. more. than just your face. If you’ve received a facial with us at The Spa, you know that to be true. 🙂
We start every treatment with a warm, soothing foot soak to begin the relaxation process and optimize not only your skin health, but your overall sense of wellness. This unexpected (and welcomed!) step is such a supportive way to relax and relieve tension you may have not even realized you were carrying.
If you have a bathtub at home, fill it up just enough to cover your feet or if you aren’t #blessed with a tub (sadly, that’s me!), you can find a smaller basin to soak your feet. Fill it with hot water, sprinkle in some Sea Soak and let your stress start to melt away. As you soothe tired toes and focus a few minutes on slow meditative breaths, trust me, your entire body and mind will feel the benefits too. And we all know, a calm mind + healthy body = happy skin!
Once you’ve set the tone for your facial and have soaked your feet, tie your hair back, take in 3 deep diaphragmatic breaths (inhale for 3, hold for 3, exhale for 6), and let’s begin!
Cleanse + Tone
While we always say cleansing is the *most crucial* step in any skincare routine, it can also be the most relaxing. Especially when you’re oil cleansing!
This isn’t just a quick splash-and-rinse-kind-of-cleanse – for this first step of your facial you really want to allow more time + intention to:
soften tight facial muscles and feed your skin through circulation from the massage component of oil cleansing
allow your mind to unwind and let go of any stressors or anxiety from the day (or week or month) with the warm washcloth removal
begin breathing in the aroma from the organic essential oils to recenter + ground your sense of wellness
and of course, to break up makeup, dissolve buildup and deeply cleanse the skin, too!
For my full Oil Cleansing tutorial, click here! Want to take your cleansing to the next level? You’ll want to watch this tutorial on Double Cleansing next. (I start all of my Holistic Skin Treatments with this 2-step cleansing technique!)
Next step: Toning. Which, in my humble (*ahem* and professional) opinion, is the glue that holds your skincare routine together. This. Step. Is. A. Must.
You may think this simple spritz doesn’t do a whole lot for your skin, but let me tell you, without it, you’re missing out on a whole slew of nourishing ingredients that your skin craves and needs to be resilient, replenished, and balanced. Generously misting toner (trust me, you can never be too generous!) after your cleansing routine properly rebalances and provides a boost of hydration that’s essential for optimal skin health.
Plus while your skin is still damp, the products you apply afterward are able to absorb more deeply and be received more readily by the skin. And the pure plant essential oils + hydrosols have powerful aromatherapy properties. I’d call that a skin win-win!
Toning Tip: Anytime you remove a product, tone! And sometimes, I’ll even sandwich my serum or cream with a final mist to seal in all the skin-loving goodness. Like I said, you can never be too generous with your toner. 😉 But beware of toners with more harsh ingredients such as alcohol (yes, even my oil-rich/acne-prone friends) – we want to rebuild the skin, not strip it.
Steam
This is one of my favorite secrets for an at-home facial: steam.
I incorporate steaming into most of my facial treatments and you can re-create the same skin-softening, pore-opening, circulation-boosting effect at home. An aromatherapy steam facial is such a therapeutic way to boost beauty, immunity and well-being during times of stress and much-needed self-care.
Not only does the warmth of the steam help to purify pores and give your skin a healthy glow, by adding organic essential oils or slices of fresh fruit or herbs helps to clear sinuses, relieve congestion and provide some serious aromatherapy benefits for your mood and mind. (And if you don’t have space in your schedule to follow every step of this at-home facial, just taking 10 minutes to be still + steam will be a game-changer on dreary days!)
Here’s how to create a steam facial at home:
Bring a pot of pure water to a boil and while the water is warming up, this is when you can take a few minutes to cleanse + tone your skin (see the step above!). Transfer boiling water to a large bowl and add several drops of your favorite essential oil or fresh fruit slices. Try: orange slices for a mental pick-me-up, lemon slices to refresh your spirit or eucalyptus essential oil to soothe your senses.
Find a comfortable place where you can sit with your face over the steam. Drape a towel over your head to hold in the heat and deeply relax. If at any point the steam feels too hot, be sure to pull your face back a bit!
Take several deep breaths, allow the aromas + warmth to do its healing work, and let the music you’re playing + the mood you’ve created help support wellness from within.
After about 10-15 minutes, spritz skin with Complexion Mist and your skin is prepped + ready for masking!
Multi-mask
When it comes to masking, one and done isn’t always the answer.
Multi-masking is a powerful way to help support the diverse, ever-evolving nature of your skin. While we do our best to bring balance to our wellness within, this approach to masking helps to bring balance back to the surface. By applying different masks to different areas of the skin, you’re able to specifically support unique skin needs – all at the same time.
Depending on the day, the climate, your monthly cycle or a stressful season in life, let your skin guide you in choosing the most supportive masks for your current skin state.
After cleansing, toning and steaming, look closely at what you’re observing on the surface of your skin and start to reflect on what you’re seeing: Larger, more visible pores? Red, inflamed areas? Specific spots of hyperpigmentation? Healthy glow? Smile lines? Worry lines? Based on what you’re observing, you can opt for a clarifying mask, calming mask or hydrating mask!
Want a little more support to discover your skin state? Click here to learn more!
Mask Tip: One of the benefits of masking in an at-home facial is that you can pair it with another self-care practice you love! While I’m all about multi-masking, my only tip for this part of your facial is no multi-tasking – no laundry, no cleaning, no emails. Once you apply a mask, this time is yours! Refill your water and try practicing deep breathing, taking a bath, reading a book, writing in your gratitude journal, or simply sitting in solitude. Just enjoy a few quiet minutes to yourself to care for your skin and your self in even more holistic ways.
Gua Sha
It’s not an at-home facial with my favorite facial tool ever of all time: Gua Sha.
After removing your mask, spritz your skin (generously!) with your toner and apply a light layer of the best skin-specific serum for your skin state. Apply about 5-8 drops of your serum – keeping in mind that you don’t want to apply too much oil so that the stone slips right off the skin. We do want a little pulling/tugging action to happen!
Think of Gua Sha like yoga for the face! It’s through movement that the skin is fed and the muscles are strengthened – creating a more toned, lifted, and sculpted appearance. Each part of the tool has a unique purpose in rejuvenating the skin by:
promoting lymphatic drainage
decreasing discoloration from sun damage, hormonal changes and acne scarring
detoxifying/depuffing (say goodbye to undereye bags + dark circles!)
clearing blockages + buildup of toxins and excess fluid
calming the nervous systems + minimizing effects of stress
Plus with its rhythmic, repetitive massage movements, Gua Sha powerfully supports stress levels by sedating the sympathetic nervous system (our fight/flight/freeze response – which is active all too often in our society right now) and tapping into the parasympathetic nervous system (rest/digest/repair) to allow the body and mind to enter a state of relaxation, focusing on reparative functions + restoring overall health. Because one of the biggest causes of premature aging is chronic stress, a consistent Gua Sha practice helps to not only address stress-induced skin conditions, it creates a calm, quiet mind.
Here are a few resources to get you started with your personal Gua Sha practice:
If you’re still unsure about this stone’s skin-transforming power, you’ve got to read this post.
Don’t have a Gua Sha stone at home? Get one here!
Now that you’re on board with this beauty technique and you’ve got your stone, click here for our step-by-step tutorial to follow along at home!
By finishing off your at-home facial with a full Gua Sha routine, you’ll be ready to face anything that comes your way – or maybe you might just be ready to climb into bed! 😉
Facial Tool Tip: Rolling with our Ridged Facial Rollers is a bit more simple than Gua Sha, but still provides similar benefits (and a much-needed boost!) for your skin health. Since facial rolling doesn’t require tons of time or expertise, this is the perfect tool if you’re tight on time, need a quick morning pick-me-up, or are a mama who’s got her hands full.
Hydrate, Hydrate, Hydrate
If you’ve made it this far, well done, friends! By now I hope you’re already feeling a major shift in how your skin is looking and feeling – and more importantly, that YOU are feeling more balanced, grounded and glowing from the inside out. That’s what all this is about anyway.
The last step is a simple one. Simply tone (you could have guessed that one by now!) to dampen your skin, take a deep breath – in and out – and seal it all in with a final layer of Beauty Cream.
Finish the rest of your fruit-infused spa water and smile at your sweet self in the mirror – and always remember: you are beautiful, you are strong, and you are not alone.
I hope by taking intentional time to create your own skin sanctuary at-home and care for yourself holistically, no matter what you’re going through, you will discover a deeper sense of beauty, hope + healing within. XO
Wellness Expert Sara Adler Shares Her Top Tips for Better Sleep
Before we jump in today, I just have to tell you one thing.
I’m actually a tiny bit nervous to share my real (unedited) nighttime routine with you guys. Because in our house, we have what we call, a sleep princess. And she’s very serious. She comes out every night, around 9pm, ready for her evening. There are very few things that get in the way of her little rituals, because well, getting great sleep affects everything else in life (obvious things like your energy, mood and patience, but also non-obvious ones like your ability to love and serve others, your creativity, your metabolism, your hunger, and your cravings).
Ok, ok, so I’m the princess.How’d you know?
So, before we dive in, you’ve been warned. Everyone’s life is a little different, and these little rhythms of mine change slightly depending on what season I’m in. But that’s the beauty in it. So feel free to adapt any of these ideas below in ways that work for you.
Sarah’s Simply Real Nighttime Routine:
STEP 1: SCREENS OFF BY 9pm
(Ok, truthfully, it would ideally be more like 8pm, but you know, #ladyboss #reallife and those of you that have #momlife going on, doesn’t always allow it.) Why? The blue light from our screens (computer, phone and TV) triggers the “awake” hormones in our brain to start pumping... literally the last thing you want when you’re trying to wind down for the night. Let alone the anxiety and stress it can create, ruminating over things you can’t change until the next day anyways.
TO DO: Download the fl.ux app on your computer and adjust your brightness settings on your iPhone to dim the blue light after 8pm every night. This helps so much!
STEP 2: START WINDING DOWN
I love to do a natural face mask (1-2x/week) to start the process. There is something so soothing and care taking about doing a face mask. Use an old makeup brush to make it quick and easy (and lump free), and treat yourself to a little podcast, book or essential oil time while you wait for it to dry. I have noticed such a difference in my skin, my mood and calmer energy with this extra 20 minute addition in my life! I love this one and this one the most.
STEP 3: LET’S TALK TONGUE SCRAPERS
Ok, it took me years to get on board with this trend. Does it really do anything, I’d wonder? It seems so extreme and like it would make you crazy. But, a word of advice: there is literally nothing better that I’ve spent $6 on from amazon, than this stainless steel one. Basically, toxins can build up on your tongue daily, even with eating clean + real food. It’s actually equal part deeply satisfying and disturbing, doing this daily. Your mouth and breath will thank you!
STEP 4: BRUSH THOSE TEETH
...With a natural, fluoride-free, stevia-free toothpaste (like this one). Chemies in your mouth = no good, whether it’s food or with any personal care products. It’s so worth the upgrade.
STEP 5: FACE TIME
Aka, I wash mine with water (or with one of Primally Pure’s cleansing oils). This was one of the funniest things I admitted in my “things I’m afraid to tell you” Instagram post a few months ago. It’s true. I wash my face with just water first. Because then, I do this:
STEP 6: CLEAN SWEEP + A QUICK SWIPE
Next, I take any extra makeup off with oils (I alternate between this organic jojoba oil and organic rosehip oil), and use an organic, natural cotton pad. It works amazingly, and doesn’t dry or pull my skin.
STEP 7: HERE COMES THE MOISTURE QUEEN
I put on a natural lip balm (like this one, in peppermint). And then start on my face and neck, rotating between these favorites: the PP Blue Tansy Beauty Cream (I like to add a drop of frankincense or sandalwood essential oil), the PP Palmarosa Mint Beauty Cream (my favorite smell) or this Egyptian Beauty Cream. Dry skin = aging skin, plus they all feel so good and smell so great, it’s like an added joy.
STEP 8: WAIT, SHE’S NOT DONE
So then, I always mix a few drops of essential oils with some coconut oil (I use this one) or magnesium spray (I love this one, it’s sting-free), and rub it into the bottoms of feet, inside of wrists, and sometimes neck and back. See my favorite essential oils and combinations here, in my full breakdown guide on the blog. I always keep a small mason jar of coconut oil mixed with eucalyptus and lavender oils on my vanity and use it as lotion whenever I need a little boost.
STEP 9: THE FINAL TOUCHES
Aka, my little eye mask goes on and my ear plugs in. Yes, it’s true. Bringing sexy back! My poor husband... but honestly, after a few years watching me and my nighttime production - he’s totally on the same page now. An eye mask (but only this kind, with room for your eyes) and earplugs are actually life changing, since any amount of light or noise can disrupt deeper sleep patterns in your body (and thus your circadian rhythms, metabolism, the regeneration + renewal of your cells, and amount of actual rest your body is getting). I never travel without them!
Princess, out.Sleep, so in.The healthy way.
Follow along for daily advice + tips on a healthy life, made simple on Instagram, and her website!
Skincare Rou-Teen: The Best Natural Products For Teen Skin
If you’re a parent to a teenager (or one yourself!) today’s post is for you.
Whether your teen is already a beauty junkie, just starting to get curious about skincare or hasn’t even given their skin a second thought, we’re unpacking the best, natural products for teen skin to help create a clear complexion and a solid foundation for health as they grow up.
From fluctuating hormones and breakouts to enlarged pores and teen pressures, not to mention the influx of social media influencers and trendy skincare tips, this can leave teens with some serious skin woes and self-esteem challenges.
But the majority of skincare on the market geared towards teens (and promising to make their clear skin dreams come true) is made with cheap, toxic ingredients that actually aggravate acne and is one of the biggest contributors to our toxic load. Plus aggressive topical acne products (like benzoyl peroxide or retinol) and internal solutions (like accutane or antibiotics) can leave teens with side effects long after their skin has cleared.
How many of us got hooked on harmful conventional products at an early age and are now seeking out solutions to reverse the damage done back in the day? I know I can’t be the only one raising my hand!
Leave drugstore cleansers, harsh ingredients, aggressive scrubs, picking, and prescriptions in the past and set up your teen’s skin for success with non-toxic skincare that actually works - and of course, looks cute on the bathroom counter.
Step 1: Clarifying Bar
Every teenager loves a good sudsing foaming face wash - and that feeling of squeaky clean skin. But while most conventional cleansers targeted to this age group deliver exactly that - they also deliver a dose of skin irritants like detergents, dyes, sulfates and fragrances. Don’t worry, the deep pore cleansing your teen craves is still possible sans stripping chemicals. Here’s how.
Unlike a lot of cleansers geared toward teens - especially at the drugstore - this gentle cleansing bar won’t leave skin feeling stripped, tight or dry. It maintains the skin’s integrity and natural pH levels for skin that remains youthful long after they’ve left their teenage years with charcoal, raw honey and purifying essential oils.
One of the Clarifying Bar's key ingredients is activated charcoal, which is most popular for its properties as a natural toxin remover and is a powerhouse when it comes to purifying the skin from blackheads and buildup. It attracts pore-clogging buildup to proactively avoid breakouts and blackheads while helping to clear up current congestion. A simple cleanse before bed is all your teen needs to keep their complexion actually clean and clear.
P.S. This bar doubles as a body cleanser! Keep one in the shower to help combat body breakouts, too.
Step 2: Everything Spray
Hectic schedules, hormonal changes and teen pressures can all contribute to unwanted skin conditions - not to mention the traditional toners that teens gravitate towards. Harsh astringents and harmful alcohols can actually exacerbate inflammation in the skin by over drying and leaving skin more susceptible to acne and sensitivities.
Look for toners with pure plant extracts, essential oils and antibacterial ingredients to help prevent and calm acne, redness + inflammation. Everything Spray contains organic raw + unfiltered apple cider vinegar to balance pH levels and is packed with powerful healing enzymes, while organic tea tree essential oil disinfects and organic lavender essential oil heals and regenerates.
Pour a bit of Everything Spray on an organic cotton round and sweep all over skin after cleansing. Reminiscent of acne-fighting pads from our past (anyone else use those when we were teens?), get the same clean, fresh feeling but without compromising the skin barrier with harsh ingredients and harmful chemicals.
“Within days I have noticed the inflammation in my acne-prone skin has gone down!” -Katie on the Everything Spray
Step 3: Clarifying Serum
A common myth among teens is that to keep skin clear and glowing, you’ve got to dry it out. This beauty belief couldn’t be further from the truth. While these methods may clear up a breakout temporarily, it actually works against the skin in the long term and can incur damage down the road. Optimal skin health requires hydration to help repair acne, any associated scarring and keep oil production under control.
Even oil-rich teen skin needs a proper balance of hydration and moisture (oil + water) to keep the barrier balanced - and to avoid vicious cycles of unwanted breakouts. This is the oil-based, clarifying serum your teen’s oil-rich/combo skin will love as nutrient-dense oils sink in deeply to leave skin glowing, not greasy (truly, a teen’s worst nightmare!).
Whether your teenager is trying to get acne under control or struggling with scarring (trying to pick away breakouts can leave teens with reminders of their acne long after its gone), marula oil, manuka essential oil and prickly pear seed oil are rich in vitamin E and C to visibly repair discoloration, keep skin tone clear and create a dramatic difference in just a few drops.
Bonus: Clarifying Mask
While clogged pores, blackheads and oil blotting sheets may have become your teens norm, instead of exfoliating the skin into a state of panic and overproduction of oil with harsh scrubs, facial masks gently exfoliate, refine texture, and help to naturally nudge the cell rejuvenation process along.
Applying a clay-based, mineral-rich clarifying mask a couple times a week can work wonders in removing dead skin buildup on the surface that can cause clogged pores and acne. Although genetics is responsible for pore size (thank you mom and dad), masks can help make them appear smaller and less visible by keeping them clear of congestion.
Here are a few of our favorite ingredients and their skin-clearing benefits:
Raw honey and white willow bark powder (nature’s alternative to salicylic acid!) gently and effectively exfoliate skin to stimulate cell turnover and minimize post-inflammatory hyperpigmentation (aka acne scarring).
Anti-inflammatory turmeric, acne-fighting manuka and scar-repairing neroli reduce hormonal breakouts and cystic acne along with any associated redness.
A therapeutic blend of organic essential oils of neroli, sweet orange, grapefruit, bergamot and manuka give this mask a fresh, citrusy aroma to inspire a positive mindset to promote a clearer complexion from within. Exactly what teens need today. :)
Apply this face mask from forehead to jawline to support an all over glow or use it as a spot treatment to target occasional breakouts and blemishes. Plus it’s a fun way for teens to spend time with friends, take a few selfies and enjoy a DIY spa night to ease tension from the typical teen stressors.
DIY Mask: This can be a fun recipe for your teen and their friends to make at their next spa night - with ingredients you may already have in your kitchen! Just blend a bit of raw honey or yoghurt with charcoal, spirulina or turmeric (just be careful since this traditional spice is also used as a natural dye will leave a yellow hue on your favorite white towel) for an active mask that calms redness, clears breakouts and lightly refines skin texture - all with a bright pop of color, perfect for taking the best selfies.
"I bought this for my 14 y.o. daughter along with the serum. This is our second order and she specifically requested these products - I just feel better that she's not applying toxins and chemicals on her face. Thankful for healthy alternatives."
-Sandra on Clarifying Face Mask
Teen Tools: Facial Roller
Teenagers today, especially girls, are getting the majority of their beauty tips from their favorite influencers. One tip that’s swirling around social media is Botox treatments for preventive aging. While this procedure used to just be popular for minimizing wrinkles that had already formed, it’s now starting to take the younger beauty scene by storm.
But when you dig a bit deeper into the reality of this injection and how it works within the skin (this post is a must read for the inside scoop and the best botox alternative!), my holistic esthetician’s heart wants to educate our younger generation on more supportive practices to keep skin youthful sans toxins. Although botox is only approved for those 18+, educating your teen on supportive skincare rituals before their 18th birthday can help them opt for more natural approaches for creating youthful skin even when their first fine line starts to form.
Enter: facial tools. One of my fav recommendations for teens is a fun, easy-to-use facial roller! These precious gemstone rollers have become famous for their ability to boost the natural glow of the skin by:
activating lymphatic flow
detoxifying skin tissue
increasing blood flow to feed skin from within
calming inflammation
brightening skin tone
decreasing puffiness
enhancing product absorption
encouraging circulation
tightening/toning skin
helping your teen feel ready to face the day ahead!
And find one with ridges to increase all of the benefits above! Facial rollers have quickly become one of the trendiest facial tools around – especially in the world of Instagram and beauty vloggers - so if your teen isn’t using one yet, show them how cool of a parent you actually are and introduce them to the beautiful world of facial rolling.
Tip: Try keeping this facial tool in the fridge or freezer for a refreshing pick-me-up for your teen’s complexion (and to decrease puffiness after a late night of studying or a sleepover).
Body: Charcoal Deodorant
Okay, you’ve got your teen on track with their skincare products but the #1 product to introduce to your teenagers that will make the biggest difference in their health (and keep them smelling fresh during gym class) is natural deodorant.
Get your teens on board with a natural deodorant to combat BO and build a solid foundation for health as they get older. Conventional deodorants teens grab off the drugstore shelf can contain a laundry list of toxic chemicals including:
Aluminum – Linked to Alzheimer’s disease and heavy metal toxicity.
Triclosan – Linked to liver toxicity, skin allergies and thyroid dysfunction.
Propylene Glycol – Linked to organ toxicity and skin irritations (and because it improves product penetration, it helps to carry other harmful ingredients in the product through the skin).
Parabens – Endocrine/hormone disruptors, found in 99% of breast cancer tissue sampled in this study.
Phthalates – Linked to permanent birth defects and endocrine disruption.
Benzyl Salicylate – Linked to endocrine disruption, weakened immune system and skin allergies.
Fragrance – referred to as the new “secondhand smoke” (that’s really all you need to know!).
While all of our best-selling natural deodorants are formulated with effective, non-toxic ingredients, one that offers even more detoxifying, disinfecting and deodorizing benefits (a must for hormonal, active teenagers) is this one packed with activated charcoal and purifying essential oils of peppermint and eucalyptus. Plus it's sleek, minimal packaging is teen-approved and won't give away their BO-busting secrets.
A couple swipes every single day is a huge step to help your teenager lead a healthy life - no matter what the day ahead may hold. If this natural deodorant thing is new to you, check out more posts to help your teen start the swap!
"My husband and teen son use the charcoal deodorant and now they never stink. I was skeptical, especially for my teen, but amazingly this stuff works!" -Janeen on Charcoal Deodorant
While these products make a big difference for teen skin, don’t forget true healing happens beneath the skin. Check out this post for acne solutions that go deeper than surface level!
We hope this post will help your teen feel more confident in creating the correct skincare routine for them and ultimately, more comfortable in their own skin - outside and in. XO
The Pure Team's Skincare Routines (And Top Product Hacks)
In celebration of our 5th birthday (YAY!), we’re highlighting the *incredible* humans behind our brand and giving you a sneak peek into the Pure Team’s personal skincare routines – from their skin state and favorite products to their step-by-step AM + PM routines and top PP product hacks.
Over the years, the #1 question we’ve heard from you is around daily skincare routines. While everyone’s skin is so unique, we thought it’d be helpful to feature a few skincare routines from our very own Pure Team to help inspire ideas for what could work for you!
Keep scrolling below to find the full product lineup that fits your skin state best (plus some fun + fresh tips to elevate your skincare routine)!
KELSEY: Marketing Manager, Mom of 2 under 2 and Hot Yoga Enthusiast
SKIN STATE My skin feels: combination + acne-prone
SKINCARE ROUTINE My product staples:
Baby Bar
Everything Spray
Clarifying Serum
Baby Balm
AM: I splash my face with warm water and put a bit of Everything Spray on a cotton pad to remove residual buildup from the night before. I then apply 5-6 drops of Clarifying Serum to my skin to moisturize for the day ahead.
PM: I cleanse my skin with the Baby Bar, follow up with a few spritzes of Everything Spray and finish with a small amount of Baby Balm.
PRO TIP FROM PP’s HOLISTIC ESTHETICIAN If you’re experiencing active breakouts/inflammation, you can apply the Clarifying Serum both morning and night to infuse the skin with even more clarifying/calming benefits.
Do you have combination + acne-prone skin (or are a busy mama!) like Kelsey? Create clear skin in less time and get her bundle here!
PP PRODUCT HACKS
I apply a few pumps of Baby Oil to remove any eye makeup and wipe away with a warm washcloth before cleansing.
I use Gua Sha to de-puff in the morning and a Ridged Facial Roller after moisturizing at night.
Try mixing a few pumps of Baby Oil with Sea Soak for an exfoliating body scrub before shaving!
ASHLEY: Skincare Chef, Student and Guitar Slinger
SKIN STATE My skin feels: oil-rich
SKINCARE ROUTINE My product staples:
Double Cleansing Kit
Everything Spray
Complexion Mist Collection (Geranium, Lavender, Neroli)
Blue Tansy Beauty Cream
AM: I start by washing my face with the Baby Bar and then spritzing on a bit of Everything Spray. I then apply Blue Tansy Beauty Cream and finish with one spritz of Geranium Complexion Mist.
PM: First, I cleanse with the Cleansing Oil (Oily), then double cleanse with the Baby Bar. After that, I use a cotton round with Everything Spray on it to remove any residual residue. To complete my evening routine, I then apply both the Lavender + Neroli Complexion Mists.
PRO TIP FROM PP’s HOLISTIC ESTHETICIAN Let your skin guide you! If you feel like your oil-rich skin is producing enough natural moisture during the day, your Complexion Mists can be the final step in your routine. Before bed, you can finish with a light layer of Beauty Cream to boost balance and health while you sleep!
Have oil-rich skin and want to become a clean skincare convert like Ashley? Finally toss your oil-blotting sheets and get her bundle here!
PP PRODUCT HACKS
This is my top tip to balance oil production, promote glowing skin and less puffiness: apply the Clarifying Mask once a week and use a Ridged Facial Roller or Gua Sha morning and night.
I also apply a little bit of Baby Balm to eyebrows to tame them!
JOYCE: Shipping Manager, Loving Grandma and Biker Babe
SKIN STATE My skin feels: combination, dull and mature
SKINCARE ROUTINE My product staples:
Cleansing Oil (Dry)
Geranium Complexion Mist
Palmarosa + Mint Beauty Cream
Plumping Serum
AM: I start by wiping my face with a clean washcloth and a bit of warm water, followed by a few sprays of Geranium Complexion Mist and finish up with 3-4 drops of Plumping Serum.
PM: I oil cleanse with our Cleansing Oil (Dry Skin) and follow up with the Geranium Complexion Mist. I then apply 5-6 drops of Plumping Serum and follow up with Palmarosa + Mint Beauty Cream overall if needed.
PRO TIP FROM PP’s HOLISTIC ESTHETICIAN Let your skin guide you! If you feel like finishing with a serum is enough hydration, let that be the last step in your skincare routine. Need a bit more moisture? Try alternating between Blue Tansy (balancing/brightening) and Palmarosa + Mint (healing/hydrating) Beauty Cream on top of your serum to support combo skin needs.
Have more mature skin and want to bring balance + youthfulness back to your complexion? Get your glow back and get her bundle here!
PP PRODUCT HACKS
I apply Baby Balm under my eyes and once or twice a week I’ll use the Plumping Mask – and of course, Gua Sha in the mornings!
I’ll spray Everything Spray on my legs after shaving, before body butter.
And always PP Deo!
GERRY: Warehouse Manager, devoted hubby and chicken wrangler
SKIN STATE My skin feels: dry
SKINCARE ROUTINE My product staples:
Baby Bar
Blue Tansy Beauty Cream
Baby Oil
Charcoal Deodorant
AM: I keep it simple and don’t do too much with my skin. I usually wash my face with the Baby Bar in the shower and put on a little bit of Baby Oil afterward. Sometimes I’ll use the Blue Tansy Beauty Cream if my skin feels dry.
PM: Same as above!
PRO TIP FROM PP’s HOLISTIC ESTHETICIAN A little bit of Beard or Baby Oil goes a long way. All you need is 1-2 drops – and it doubles as a facial moisturizer or shaving oil.
Want to keep your skincare routine minimal but still maintain healthy, hydrated skin? Get Gerry’s bundle here!
PP PRODUCT HACK
Can’t go a day without my Charcoal Deodorant.
COURTNEY: Holistic Esthetician, Content Curator and Jet Setter
SKIN STATE My skin feels: combination, dull/dry + acne-prone
SKINCARE ROUTINE My product staples:
Cleansing Oil (Normal)
Everything Spray
Complexion Mist Collection
Clarifying Serum
Palmarosa + Mint Beauty Cream
AM: I begin by splashing my face with warm water and then spritz a bit of Everything Spray onto an organic cotton round. I then take that and gently sweep it across my face to create a clean canvas for the day. I then spray Complexion Mist (I blend the Neroli + Lavender Complexion Mists together!) onto my face and apply 4-5 drops of Clarifying Serum while the skin is still damp to help lock in moisture.
PM: First, I start by oil cleansing to remove any residue that may have accumulated throughout my day (also removes eye makeup!) Next, I follow up with which ever Complexion Mist my skin is needing that evening and apply about 5-6 drops of Clarifying Serum. If my skin is still craving a bit of moisture I’ll follow up with a bit of Palmarosa + Mint Beauty Cream to finish!
PRO TIP FROM PP’s HOLISTIC ESTHETICIAN See below 😉
Want to brighten your skin + minimize breakouts no matter where the wind may take you? Get Courtney’s bundle here!
PP PRODUCT HACKS
I’ll spritz my Complexion Mist before AND after applying my serum or Beauty Cream. I feel like it adds another layer of hydration + healing.
Soothing Serum +CBD is my skin’s saving grace (seriously minimizes deeper cystic acne almost overnight).
I’ll also alternate my masks throughout the week depending on how my skin is feeling – but the Plumping Mask takes the cake!
And of course, facial tools (Gua Sha + Ridged Facial Rollers) make a world of difference in my skin.
MADDY: PP’s Skincare Chef, Writer and Tattoo Lover
SKIN STATE My skin feels: oil-rich
SKINCARE ROUTINE My product staples:
Double Cleansing Kit (Oily)
Neroli Complexion Mist
Fancy Face
Clarifying Serum
AM: I splash my face with warm water, follow with a few sprays of Neroli Complexion Mist and 3-4 drops of Clarifying Serum.
PM: I double cleanse with Cleansing Oil (Oily Skin) and Baby Bar, follow with a few sprays of Neroli Complexion Mist and 3-4 drops of Fancy Face Serum.
PRO TIP FROM PP’s HOLISTIC ESTHETICIAN Even oil-rich skin needs skin-loving oils! Skin that is stripped with harsh cleansers or chemicals (which sadly, is often the go-to acne protocol) can go into a state of shock and start to *overproduce* sebum to make up for the lack of oil. The outcome? Excess oils and even more acne. To help bring balance to oil-rich skin states, it may sound counterintuitive, but steer clear of oil-free formulas. I can’t say it enough – healthy, skin-loving oils are really, really good for your skin!
Want to finally find balance for your oil-rich complexion? Get Maddy’s must-have bundle here to minimize oil production + promote seriously healthy skin!
PP PRODUCT HACKS
Baby Balm makes a really great untinted eyebrow gel for low maintenance makeup days!
Everything Spray is amazing for healing sunburns quickly and with minimal peeling.
I take eye makeup off with Baby Oil and also rotate Soothing Serum +CBD at night.
When I’m not falling asleep on my feet, I do Gua Sha or a Ridged Facial Roller.
MICHELLE: PP’s Shipping Lead, Music Junkie and Sports Mom
SKIN STATE My skin feels: dry
SKINCARE ROUTINE My product staples:
Double Cleansing Kit (Normal)
Everything Spray
Soothing Serum
Lip Balm Set
AM: I typically just splash my face with warm water and spritz a bit of Everything Spray as well and then apply a few drops of Soothing Serum. Oh and most importantly, Lip Balm all day 🙂
PM: I wash face with the Baby Bar nightly and usually oil cleanse about 2x week-ish. Every night I use the Everything Spray as my toner and about 5-6 drops of Soothing Serum to moisturize!
PRO TIP FROM PP’s HOLISTIC ESTHETICIAN To support dry skin states, start building moisture at the beginning of your day! Apply Everything Spray to refresh + detoxify and then boost hydration with a Complexion Mist/Skin-Specific Serum.
Relieve dryness and rebuild hydration with Michelle’s go-to products. Get her bundle here!
PP PRODUCT HACKS
I apply Baby Balm on my hands before putting on gloves at work.
I mask once a week – Clarifying Mask when I’m breaking out, Soothing Mask when my skin is dry.
TRAVIS: PP’s Director of Production, Craftsman and Cactus Collector
SKIN STATE My skin feels: dry/sensitive
SKINCARE ROUTINE My product staples:
Baby Bar
Everything Spray
Baby Balm
Peppermint Lip Balm
AM: I keep it pretty simple and typically just wash my face with the Baby Bar and apply a little Baby Balm afterward.
PM: Same as above!
PRO TIP FROM PP’s HOLISTIC ESTHETICIAN Everything Spray is perfect to help prevent ingrown hairs after shaving or to soothe skin sensitivities. Plus it has such a clean/refreshing aroma from Tea Tree and Lavender!
Support sensitive skin in just a couple simple steps – get Travis’ bundle here!
PP PRODUCT HACKS
Everything Spray works very well to soothe sunburnt skin – those cactus’ aren’t going to water themselves!
TONYA: PP’s (fabulous) Office Manager, Problem Solver and Baby Whisperer
SKIN STATE My skin feels: combination/balanced
SKINCARE ROUTINE My product staples:
Baby Bar
Everything Spray
Plumping Serum
Palmarosa + Mint Beauty Cream
AM: I wash my face with the Baby Bar, follow up with a bit of Everything Spray and finish with 3-4 drops of Plumping Serum.
PM: In the evening, I repeat my morning routine but replace the Serum with our Palmarosa + Mint Beauty Cream!
PRO TIP FROM PP’s HOLISTIC ESTHETICIAN Let your skin guide you! Typically we suggest cleansing just 1x/day (at night before bed), but if you feel like your skin needs more of a refresh first thing, the Baby Bar is the best gentle cleanser to start your day.
Maintain healthy, balanced skin with Tonya’s staple products – get her bundle here!
PP PRODUCT HACKS
I love the Mojito Beard Oil for shaving my legs – it makes my legs feel so smooth and I can even go longer between shaves. A MUST!!
RYLIE: Spa Experience Coordinator, Makeup Artist, Nature Lover
SKIN STATE My skin feels: dry
SKINCARE ROUTINE My product staples:
Cleansing Oil (Dry)
Clarifying Serum
Blue Tansy Beauty Cream
Baby Balm
AM: I usually just wipe my face with a warm washcloth and then apply 5-6 drops of Clarifying Serum all over my face.
PM: I oil cleanse and then apply Blue Tansy Beauty Cream all over. Afterwards I apply a bit of Baby Balm under my eyes and then Zzzzzz..
PRO TIP FROM PP’s HOLISTIC ESTHETICIAN Try adding in a Complexion Mist in the morning to replenish the skin + boost the benefits of your Skin-Specific Serum!
Get naturally glowing skin like you just stepped out of the spa – get Rylie’s bundle here!
PP PRODUCT HACKS
When skin is looking extra dull, I put on Clarifying Mask to jumpstart my week!
I also use Lip Balm under my eyes if I’m on-the-go.
And I always Gua Sha while reading before bed!
We hope these skincare routines + product tips help take your skin to the next level! Leave a comment below with your go-to PP products and routine 🙂 XO
Easy Tips To Elevate Your Skincare Routine (And Results)
Before we get into this week’s blog post, I have a few questions for you:
Are you getting the most of your skincare routine?
Are you hitting your skincare goals?
Are you happy with your current lineup?
Whether it’s an enthusiastic “yes!”, a hesitant “no” or an honest “I don’t know”, you’re probably investing quite a bit of time and energy (along with your hard-earned $$) into the products you’re applying to your skin on a daily basis.
What if I told you there were super simple adjustments you could make to your routine - without requiring a complete overhaul - to help you get the most out of every drop from your products and even better, more visible benefits for your skin.
Today I’m spilling easy tweaks to elevate your skincare routine - and results!
Double Time
If you’re not double cleansing yet, this upgrade to your daily routine will make all the difference. After a long day, it can be all too easy to skimp on this step (or skip it entirely), mindlessly move through the motions and miss areas of debris and buildup - which can lead to chronic inflammation and degrade youth-promoting compounds like collagen and elastin.
This 2-step cleansing technique works double time to ensure a completely clean complexion without any residual impurities, pollutants or product. After double cleansing, all that remains is a clean, radiant and balanced complexion. Let's break it down:
Step 1: Use a Cleansing Oil first to effortlessly lift impurities, dissolve excess sebum and melt away makeup, even eye makeup (plus this cleanser contains castor oil which encourages hair growth: an added bonus for your lashes and brows), without stripping the skin’s natural lipid barrier. Keeping this barrier balanced is a *must* to avoid vicious cycles of acne, inflammation and dehydration.
Step 2: Suds up with a second cleanser that contains properties that are customized to your skin’s specific needs. Here are a few key ingredients to look for:
Charcoal purifies congestion and clarifies an oil-rich complexion.
Rose kaolin clay stimulates cell renewal and infuses dry skin with moisture.
Lavender gently cleanses while calming skin with antibacterial compounds.
Double cleansing daily, or even just a few times a week, is an easy way (did I mention it only takes 2 minutes?) to effectively eliminate breakouts, slow down the effects of aging and allow maximum penetration of your superpower skincare products to follow - like your toner...
Seal It In With A Spritz
Toning is one of the most overlooked and understated steps in your skincare routine, but the secret to elevating your results is to make this nutrient-dense mist your go-to when transitioning from one step to the next.
The golden rule of toning is that any time you remove a product, like a cleanser or a mask, replenish with a few mists and press into skin to enhance penetration. But if you want to take your glow to the next level, spritz after applying your serum/cream to seal in all the skin-nourishing ingredients. Both oil and water are needed for naturally glowing skin and this final spritz drives hydration and healing even deeper into the skin.
Typically I try to live by the philosophy, less is more - but when it comes to toning, more is just, well, more. ;)
Masking Secrets
It’s no secret that adding in a facial mask a few times a week is going to give you a more radiant, refined complexion. But here’s my secret for heightened results from your skin-specific mask: honey tapping. Have you tried it?
The tacky texture of honey paired with a simple tapping technique wakes up stagnant lymphatic flow (which is essential for clear, youthful skin) and optimizes drainage to expedite detoxification, immediately depuff and reveal a brighter, firmer appearance.
How to: After applying your skin-specific mask, gently tap your skin with your fingers, moving from your neck up the face and finishing on the forehead. Make honey tapping a weekly habit to revive your skin, relax your mind and create healthier skin, from the outside in and the inside out.
It's All About The Layers
Now that we’ve already laid a solid foundation for optimal skin health, let’s round out your routine (and elevate your results even more) by layering your targeted treatment products.
Specific products in your skincare routine actually work better together and build on the benefits of one another. Organic, high-performing plants and sustainably-sourced animal fats function synergistically to enhance effectiveness and feed the skin at a cellular level.
As you finish up your skincare routine, apply a lightweight skin-specific serum first to deliver active ingredients straight into the skin. Then layer a more occlusive skin-specific cream over your serum to seal in hydration and provide a layer of defense as you face the day ahead. It’s that simple!
P.S. If you feel like layering a serum and cream in your morning routine is a little much for your oil-rich skin, try layering just at night for a double dose of plant medicine while you sleep and wake up to skin that’s balanced and oh so glowy.
Okay guys, remember the questions I asked at the start? If “yes” wasn’t your answer to all three, these tips are going to help change that. Get ready to actually reach your skin goals and finally find a skincare lineup - and results - you love.
Give these easy skincare tweaks a try tonight, and trust me, your skin will feel like it just spent the day at the spa (but in a lot less time) - and your mind just might feel the same way, too. Sounds like a win-win to me. :)
Tell us what skincare tweaks have made a difference for your skin! Drop them in the comments below. XO
5 Simple Ways To Treat Yo Self!
As a new mom, I’m realizing the importance of providing myself with small and easy indulgences whenever I can find the time. It definitely isn’t easy, but I’m finding that I have more energy and drive to take care of others when I am able to care for myself as well. And while I would LOVE to spend a week in a luxury over-the-water bungalow in Fiji, go on regular shopping sprees, get a massage once a week etc., these things aren’t always a possibility (as much as I would like them to be)!
So instead, we’re going to focus on a few simple ways to make life more enjoyable on a day to day basis.
Here’s our top 5 ways to treat yo self!
Tip #1: Establish a morning routine. This one is HARD. Especially with kids! But it’s something worth shooting for, as research has shown that successful people tend to have fairly established morning routines.
This doesn’t have to mean waking up at the crack of dawn to go on a 6 mile run followed by 4 loads of laundry and a gourmet breakfast. It can be something as simple as taking 10 minutes to read a devotion or do some journaling while enjoying a cup of coffee or bone broth. Taking a few seconds to wake up your complexion with this stuff can also give your day a beautiful jump start (I can’t leave the house without it)!
Tip #2: Take a bath. This one is my favorite! There’s nothing that helps to melt away the stress of the day (while simultaneously soothing sore muscles and detoxing the body) like a nice warm bath.
Our Sea Soak (detoxifying + soothing) and Flower Bath (softens + balances skin) are perfect for promoting relaxation after a long day. They also make great gifts! And if you’re REALLY serious about bathing, our Spa Kit may be your new best friend. It contains samples of our Sea Soak and Flower Bath along with a dry brush (helps to stimulate the lymphatic system and enhance blood circulation) and travel-size body oil to moisturize and revitalize the skin post-bath.
Tip #3: Diffuse your favorite essential oil. I’m always blown away by how much of a mood-boosting difference essential oils can make when diffused in the home or workspace! Citrus essential oils are especially uplifting and can even help to purify the air. Lavender is very soothing and can help to promote good sleep. EOs have so many amazing properties and diffusing the right one at the right time can bring much needed relief/happiness!
Tip #4: Indulge in a mini facial. Bring the spa to your home with an easy DIY face mask made with common household ingredients.
Some of my favorites include a lemon + honey mask (lemon brightens skin tone and honey has antibacterial properties), melted coconut oil + coffee grind mask (coconut oil nourishes skin while coffee enlivens and invigorates the complexion), and an activated charcoal mask (super messy, but the charcoal is UNPARALLELED in binding to and removing grime and build-up in the skin).
Tip #5: Go for a long walk. The “great” in the great outdoors is there for a reason! These days, it’s easy to hibernate inside when we can do everything from shop for groceries to interact with friends/family without ever getting off the couch.
But when we spend too much time cooped up indoors, we deprive ourselves of immune-boosting + mood elevating Vitamin D and the fresh air our skin and spirit craves!
We hope you’ll find joy through incorporating these tips into your daily life! What are some of your favorite ways to treat yo’self?
This Clean Beauty Blogger Shares How To Transition To Non-Toxic Products
Is it just me or does it seem like everyone is hyper-focused on living a healthier lifestyle these days? We are constantly seeing new products and ideas to help cleanse our body and mind. Sorry, I’m not sorry, but they are onto something!
Once you open your eyes to the world of natural living, you’ll begin to see just how many chemicals we’re exposing ourselves to on a daily basis. Just when we thought we could rely on our “all natural” facial cleanser or “organic” body lotion, we may have been deceived – sneaky, I know.
WHY TRANSITION?
With consistent exposure, our bodies retain and build up those nasty chemicals. It may start with a migraine here and there, or a bout of abdominal discomfort, but could eventually turn into a chronic condition, which is typically masked with more chemicals like painkillers and steroids.
Your body wants to naturally detoxify itself through its 5 detox organs (skin, lungs, intestines, kidney, and liver), however, it can experience a block if it’s constantly bombarded by chemicals.
You can experience an even greater detox, than any you can buy online if you just take a closer a look at some of the products you use every. single. day.
Just like it takes a while for your body to slowly accumulate these chemicals in your body, it may take time to cleanse your body and cabinets of these chemicals. Over time you’ll be able to see, and more importantly feel the results of detoxifying your body.
You may experience benefits such as increased energy levels, mental clarity, clearer complexion, and decreased depression. Isn’t that what we are all looking for in this life?
WHERE TO START?
Try not to overwhelm yourself by feeling like you need to replace every product in your home immediately. When I first started to transition my home, I turned a bit manic – throwing out every consumer product in my home. Trust me, this will stress you out and probably give you the same symptoms we’re trying to avoid here.
Start by making a list of the top ten items that you use daily. This could be anywhere from your facial cleanser to your dish soap.
Once you have your list set, take a look at the ingredient list. If you recognize most of the ingredients on the list, then great job, you’re already on the right track. If not, then you know you’ll need to do a little bit more work.
Luckily, there a lot of great resources that have done the homework for you.
You can quickly check each one of your products on the Environmental Working Group’s Skin Deep Cosmetic Database’s website or you can download their app. Simply type in the name of the product or brand, and the site will provide you with a list of ingredients and their safety ratings.
You may not always find your product in this particular database but that doesn’t mean that it didn’t make the cut. The company may just not have provided all of the necessary information to be listed.
If you find that you need to look up each individual ingredient, Paula’s Choice Ingredient Dictionary provides you with a lot of great information about the ingredient and if it has a poor, average, good or best rating. Both websites also provide supporting medical research if you really want to dive in deeper.
Once you’ve narrowed down your list, it’s time to go shopping!
You can browse EWG’s site by product category to help narrow down the specific product that’s right for you (this is especially beneficial for household goods). If not, check out Sephora’s new ‘Clean Beauty’ section on their website, which are all free of parabens, phthalates, formaldehyde, mineral oils, and more.
MY FAVORITES
I have rounded up a few of my go-to’s that have passed my ‘clean’ test.
Primally Pure Deodorant: This product should be at the top of your list when you first start transitioning your home. One of my favorite things about this deodorant is that it feels like real deodorant and it actually works. There is a variety of scent options that all smell very clean and refreshing. The size of this stick is easy to store and travel with too!
Puracy Natural Body Wash: This is my new favorite body wash that I use daily. It is a coconut-based cleanser that provides a luxurious foam and leaves the skin feeling hydrated. It also has a wonderful and refreshing citrus scent.
Leahlani Mermaid Face Mask: I have chosen Sundays as my weekly face mask ritual. It is such a great way to prep your mind, body, and spirit before the workweek begins – my husband has even joined in! After a week of working late, staying up late, and sweaty workouts, I always feel like my skin needs to hit the refresh button. I look forward to applying this beautiful superfood mask every week as it gives my skin such an amazing glow the next morning!
RMS “Un” Cover-Up Concealer: OK. I will admit that I am a concealer fanatic. There is something magical about a product that can make you look like you had 8 hours of sleep when you only had two. This concealer is very creamy and easy to apply!
Cheers to a healthier and cleaner 2019 friends!
Be sure to follow Haley on Instagram and check out her website for more clean beauty tips + healthy recipes!
Holiday Skin Rehab
We hope that you fully enjoyed your holidays with loved ones – and maybe even treated yourself to your family’s traditional Christmas cookies and didn’t decline the bottle being passed around the table. But, now it’s time to take a bit more intention with your skin and self after this joyful (and indulgent!) season. Here’s some simple, easy-to-implement holistic skin care tips that we’ve gathered to give your skin a little holiday rehab.
RELAX + DETOX
Relax with a cup of herbal tea instead of your go-to glass of wine after work. Let your liver + digestive system rest and sip roasted dandelion tea to support the detoxification process. Its rich, spiced flavor will calm your senses as well as inflammation and toxic buildup throughout the body and skin.
Also as a part of your skin rehab, consider giving your body a break from caffeine. While it can give us a bit of a jumpstart when we’re feeling sluggish, caffeine ultimately dehydrates the body (which has a direct effect on your skin) and it also stimulates the nervous system – adding stress to our already overworked adrenals. What our body actually needs, especially after the stress of the season, is to slow down, detox and rebuild nourishment + hydration.
Swap out your morning pour over with an adaptogenic blend of herbs to help boost your immune system and moisture levels after one too many holiday lattes and layovers.
MASK
Make this simple DIY mask at home to infuse life into thirsty skin that’s dull + dehydrated. Full of Vitamin A and enzymes, this mask will help to gently exfoliate skin while helping to heal and hydrate.
1/2 cup pumpkin 1 tsp raw honey 1 egg white
Or try out this deep cleansing mask to purify and detox post-holiday skin.
NAP
We’re adopting this tip from a wise woman, dear friend and professional napper, Jenna Kutcher. We give you permission to nap and allow yourself to recharge – in the middle of the afternoon. The benefits of a quick cat nap are immense and will help to reboot your body + mind after the hustle of the holidays. Even if you take just 20 minutes out of your lunch break or schedule it in on Saturday afternoon, closing your eyes and letting yourself rest will help to decrease stress, rejuvenate skin, increase alertness and boost brain function. Exactly what we need after this festive (yet, stressful!) season. Say goodbye to grogginess and hello to glowing skin.
MOISTURIZE
Not only does holiday travel take a toll on our skin’s appearance, but as temperatures drop this time of year, so does our skin’s moisture levels. While this tip may seem like a given, it’s essential to choose a moisturizer that’s specifically formulated for your face. Facial skin is much more delicate than the skin on the rest of our body. It requires more gentle ingredients that help to deeply nourish without clogging pores or merely sitting on top of the skin.
Conventional beauty creams are filled with chemicals that appear to be hydrating, however, these products often coat or clog (i.e. suffocate) your pores. Or if they do penetrate the skin, harmful ingredients are potentially headed straight to your bloodstream. Moisturize your dry + dehydrated skin with real, vitamin-rich, healing ingredients such as tallow from grass-fed cows, organic essential oils to soothe inflamed skin and potent herbs + plant-based oils to leave your skin truly glowing with health and hydration.
Oh, and don’t forget your lips! We love applying lip balm before bed and waking up to smooth, moisturized and plump lips – even in the winter. Chapped lips don’t have to come with the colder months, make them a thing of the past.
We hope these tips will help to bring your skin back to life and not only nourish and balance your body, but your whole self. Share this post with a friend and tackle this holiday skin rehab program together!
Ingredient Spotlight: Why We Use Activated Charcoal (+ Skin Benefits You’ll Love)
My first experience with activated charcoal happened a few years ago when I came down with a nasty bout of food poisoning. Instead of seeing a doctor or taking medicine, I decided to consult Dr. Google on what to do.
I probably typed in “natural remedies for food poisoning” or something like that.
One of the first things that popped up was activated charcoal. Charcoal becomes “activated” when oxygen is added to it, increasing the charcoal’s porosity and surface area – but more on that soon.
I’d heard of people with alcohol poisoning taking large amounts of charcoal in hospitals to get it out of their system, so it made sense that it would help remove the food poisoning toxins from my body.
My husband drove me to Sprouts to buy a jar of activated charcoal, and I took two capsules right away. I don’t remember exactly how quickly I started feeling better, but it was faster than I ever imagined.
A few hours later, I took two more capsules. By the time I fell asleep and woke up the next morning, I was pretty darn close to feeling 100% back to normal! This was my first venture into exploring the various uses for activated charcoal – clearly, I was on to something.
Today, charcoal is widely accepted as a strong detoxifying agent, purifier, and skincare ingredient. It’s used in almost everything, from toothpaste to water filters, to one of the most popular: skincare products. But even with its widespread popularity, this is a pretty fascinating ingredient that I don’t want to skim over.
Let’s explore the many facets of activated charcoal: how it’s made, how to use activated charcoal, and my favorite part – charcoal skincare.
How Is Activated Charcoal Made (+ What Is It)?
Activated charcoal is a substance created by heating naturally carbon-rich materials, such as:1
Wood
Peat
Coconut shells
Sawdust
When I say heating, I mean very high temperatures. “Activating” the charcoal in this way reduces pore size, strips previously absorbed molecules, + frees up bonding sites.1 This is important because one of the main benefits of activated charcoal is its ability to bond with (and remove) toxins.
As you can imagine, this proves useful in various health-related situations, as well as in skin care.
Due to reduced pore size and more holes in individual molecules, activated charcoal contains a large surface area for its size. Just check out this stat:1
“One teaspoon of activated charcoal has about the same surface area as a football field.”
Impressive, right?
Activated charcoal comes in pill forms as well as powder. It’s very inexpensive and can be a lifesaver in many situations (which I’ll discuss below). And since a little bit goes a long way, activated charcoal lasts a LONG time.
Here are some of the tried + true uses for activated charcoal.
How to Use Activated Charcoal (+ Things to Know)
I’m not a doctor, and this isn’t medical advice when it comes to treating illnesses, diseases, or medical diagnoses. So, of course, seek guidance from your holistic practitioner before using it in any medical-related setting.
These are the ways activated charcoal has been useful to me + what some studies tell us. But it’s definitely not the end-all-be-all ruling on activated charcoal. We all have unique bodies and situations. So make your best-informed decision. :)
Internal Uses for Charcoal
Because it’s extremely porous, activated charcoal can attract and hold onto material and debris within its pores. But it isn’t absorbed by the body – so it can bind to and eliminate toxins within the body.
But it’s important to note that activated charcoal can also bind to good things that we WANT in our bodies (vitamins, minerals, etc.). So it shouldn’t be taken internally on a regular basis or with supplements/vitamins/prescription medications.
With that said, studies have shown the effectiveness of activated charcoal to:
Resolve several forms of poisoning in a medical setting
Help calm an upset stomach2
Reduce excessive gas3
Assist kidneys in removing toxins4
Filter toxins + enrich water with elements like sodium and potassium5
Now, I’m not advocating using charcoal for any of these uses, but they’re helpful for context.
But here’s what I am advocating: considering these points, it’s pretty exciting how this translates to what activated charcoal can do for skin care.
Alright, let’s dive into my favorite part: charcoal skincare.
Charcoal Skincare
Just as activated charcoal binds to toxins inside the body, it does the same on the outside – which is why I LOVE including it in skincare products. When used topically, a lot of the internal risks of charcoal are negated since the body doesn’t absorb charcoal.
The European Journal of Pharmaceutical and Medical Research has confirmed activated charcoal’s ability to attract:6
Bacteria that cause acne + inflammation
Poisons + chemicals (toxins)
Dirt + debris (black-head culprits)
Other micro-particles
Excess oil
So with its ability to attract these components, we can use activated charcoal to bring these contaminants to the surface of your skin through charcoal-infused skincare.
The result: a clear complexion, less inflammation, and fewer breakouts + acne. But please note: some charcoal can be created from petroleum – which you definitely don’t want to apply to your skin. I recommend sticking with safe sources like activated charcoal produced from coconut hulls. Here are my favorite products/ways to embrace the power of charcoal skincare:
At-Home Ultra Cleansing Face Mask
Since my teenage years, I’ve been plagued with acne and less-than-perfect skin. And although my skin has improved A LOT since adopting a real food diet, making lifestyle changes, and switching to 100% natural skincare products, I still get the occasional zit/breakout.
Activated charcoal has been a total game changer in my skin journey over the years – which is exactly why we use it in some of our best-selling products. Here’s an easy way to use it at home: a super deep cleaning face mask. Since I began using activated charcoal as a facial mask, I’ve noticed a major shift in the cleanliness of my skin. My pores appear to be smaller and less filled with gunk.
To make a charcoal mask:
→ Mix one opened capsule of activated charcoal powder (or 1/2 teaspoon) with about eight drops of water. You want it to have the consistency of a paste – not too cakey and not too runny.
Then apply – easy! I leave the mask on for about 30 minutes before thoroughly rinsing it off with our Baby Bar.
*Warning: Activated Charcoal is SUPER messy, but it does come off most surfaces if washed right away. Be careful not to touch your face or let your face touch anything when wearing the mask. In fact, you might want to wear an old t-shirt when handling activated charcoal powder and use a black washcloth to avoid staining.
Tips: Apply right before a shower so it’s easier to wash off.
→ Tip if you have big pores (like me): activated charcoal may temporarily “stain” your pores for up to 48 hours. When I say “stain,” I just mean it may give a darker, more obvious appearance than normal. This isn’t super noticeable and will always go away, but it’s something to consider (especially if you decide to apply the mask before an important event).
Charcoal Deodorant
There’s a reason our charcoal deodorant is one of our best-sellers – men included. It’s loaded with anti-inflammatory and antibacterial workhorses + toxin-binding charcoal. If you struggle with excessive sweat (or the dreaded sweat stress), this non-toxic charcoal deodorant is your ticket to managing sweat.
In combination with powerful odor-busting and moisture-wicking baking soda, kaolin clay, and arrowroot powder, activated charcoal adds an extra boost. It gets right to work detoxifying, deodorizing, and disinfecting pits. And though charcoal helps release toxins through sweat, it’s important to be sure you’re using a fully non-toxic deodorant. Here’s a helpful guide if you need somewhere to start. :)
Zit Spot Treatment
Similar to the facial mask as charcoal skincare, activated charcoal also makes an amazingly effective spot treatment for breakouts and acne-prone skin. It helps pull toxins + inflammatory bacteria to the skin's surface to purify pores and heal the skin.
How to use activated charcoal as a spot treatment:
→ At the first sign of a new zit, mix one capsule of activated charcoal powder with a few drops of water. Apply to the pimple and surrounding area.
→ Let it sit for about 30 minutes.
Do this a few times a day until the zit is gone (this method usually gets rid of pimples within a day or two for me).
Clarifying Bar (Double Cleanse Method)
Many of our spa guests rave over the improvements they see in their skin after adding our Clarifying Bar to their skincare routine for acne. If you’re unfamiliar with double cleansing, here’s the rundown: you’ll want to follow up your nightly oil cleanse with a second cleanse using a gentle glycerin-based soap.
Our Clarifying Bar features activated charcoal, which gives it its beautiful dark hue. It provides light exfoliation paired with antibacterial, antimicrobial, and astringent properties. It does all this without stripping the skin like traditional cleansers + acne treatments.
It’s perfect for those struggling with acne or anyone who loves the feeling of a good thorough cleanse. :)
Bug Bite Remedy
This was probably the most astonishing experience I’ve had with activated charcoal. A while back, I had a pretty gnarly bug bite on my forearm. I have no idea what it was from, but it was swollen, irritated, and red. And it wasn’t going away.
After a few days of being unable to move my wrist more than a 1/2 inch in any direction due to the extreme swelling, I decided to experiment with my trusty activated charcoal. I made a paste of AC mixed with a few drops of water and applied it to the bite. I covered it with a large bandage and let it sit overnight.
When I woke up, the swelling had gone down significantly, and I could move my wrist around like a normal person again!
I applied the paste the following night and didn’t need to do anything beyond that. My bug bite had already healed faster than I’ve ever experienced before (and I’ve had many – I’m one of those people bugs love).
Again, I’m not an expert or a medical professional, but this sure worked for me! I love that it speaks to the powerful detoxing and calming properties of activated charcoal.
Activated charcoal has garnered so much attention over the last few years. In my opinion, it’s well deserved as a non-toxic, deeply purifying, + potent ingredient that can make all the difference in your skin.
Will You Be Adding This Powerhouse Ingredient to Your Routine ASAP?
Do you think all of this sounds crazy? Or are you dying to add activated charcoal to your personal care routine? If you haven’t tried any charcoal skincare products from Primally Pure, give them a shot.
The power of activated charcoal with clean, non-toxic ingredients and proven benefits means you’ve got nothing to lose – and only good things to gain.
XO, Bethany – Founder of Primally Pure
Sources:
Medical News Today | What Are the Benefits of Activated Charcoal?
Taylor & Francis Online: Peer-Reviewed Journals and Articles | Is There a Role for Charcoal in Palliative Diarrhea Management?
European Food Safety Authority | Scientific Opinion on the Substantiation of Health Claims Related To Activated Charcoal and Reduction of Excessive Intestinal Gas Accumulation And Reduction of Bloating
National Library of Medicine | Oral Activated Charcoal Adsorbent (Ast-120) Ameliorates Ckd-Induced Intestinal Epithelial Barrier Disruption
Research Gate | Evaluation of Potential Use of Charcoal as a Filter Material in Water Treatment
European Journal of Pharmaceutical and Medical Research | Formulation and Evaluation of Gel Containing Neem, Turmeric, Aloe Vera, Green Tea, and Lemon Extract With Activated Charcoal And Honey
Pin your fav blog post below:
How To Transition Your Skincare For Healthy Winter Skin
Baby, it’s cold outside! As you swap your sundresses and denim cut-offs for chunky knits and turtlenecks, your winter skincare routine should follow suit.
Because as the weather changes, our wardrobe isn’t the only thing that needs to adapt, our skin does too. As temperatures drop this time of year, so do our moisture levels – leading to a complexion that’s dull, dehydrated and more susceptible to sensitivities.
That means it’s time to take stock of your current skincare routine and make some adjustments depending on what your skin is saying. From the blistering cold outdoors to blasting heat indoors, fluctuating temps can really take a toll on your skin. But flaky, dry, weather-beaten skin doesn’t have to be inevitable – a few simple tweaks is all it takes!
To keep skin glowing and hydrated, keep reading. Here are a few tips to help transition your skincare routine for healthy winter skin, all season long.
START HERE: CLEANSING
Start here for healthy winter skin! Rebuilding hydration + preserving the skin’s natural moisture barrier starts with the first step of your skincare routine: cleansing. So this season, swap stripping soaps + conventional cleansers for a Cleansing Oil properly formulated for your skin state to balance the skin, leaving it purified and properly hydrated.
Cleanse nightly with nourishing oils to deeply cleanse and wash away the day (even holiday makeup and buildup) – without over-drying the skin. To find out exactly how to do it, watch this tutorial!
Cleansing Oil Tip: Make sure to use warm water – not hot! Although scalding, steamy water might be tempting during the cold, winter months, it can actually cause skin to become even more dry and depleted. Warm water is all you need to soften skin, purify pores and feel ahhhh-mazing all winter long.
WEEKLY WINTER STEAM
Add even more elements of warmth to your routine and upgrade your winter wellness + skincare ritual with a weekly aromatherapy steam facial. This is such a therapeutic way to boost beauty and immunity during the winter months. Not only does the warmth of the steam help to purify pores and give your skin a healthy glow, organic essential oils of eucalyptus, peppermint + spearmint help to clear skin (and sinuses), relieve congestion and provide powerful aromatherapy benefits for your skin and mood.
Here’s how to create a steam facial at home:
Bring a pot of pure water to a boil and while the water is warming up, take a few minutes to oil cleanse your skin (see winter tip above!). Transfer boiling water to a large bowl and add a couple spoonfuls of Sea Soak.
Find a comfortable place where you can sit with your face over the steam. Drape a towel over your head to hold in the heat and deeply relax. If at any point the steam feels too hot, be sure to pull your face back a bit.
Take several deep breaths and allow the aromas + warmth to do its healing work.
After about 10-15 minutes, follow the steps below to complete your winter skincare routine and seal in moisture.
LIGHTLY EXFOLIATE (KEYWORD: LIGHTLY)
To combat dry, dull winter skin, mask more often! Without proper exfoliation, you may just be applying moisturizer on top of dead skin cells, which doesn’t allow for nutrients to actually hydrate and heal. But steer clear of harsh ingredients + aggressive exfoliation techniques that actually strip and irritate winter skin even more.
Stick with natural clays, raw honey and botanical oils that are rich in minerals, vitamins, enzymes and humectants to gently slough off dead skin cells, refine skin texture and optimize hydration – and even help to boost the absorption/benefits of your serum + moisturizers! These are a few of our go-to masking ingredients to nourish winter skin:
Raw honey: this superfood is a natural humectant and infuses hydration into the skin.
Hibiscus: a natural source of AHA’s (alpha-hydroxy acids) and antioxidants to stimulate cell turnover and support moisture levels.
Bakuchiol: this natural retinol alternative accelerates cell renewal and improves skin texture.
Marshmallow root: works in the same way as hyaluronic acid to deeply hydrate + heal.
Mask Tip: Set aside time in your evening ritual to mask and relax! Try applying a light layer of raw honey mixed with hibiscus powder + pink clay or try this nourishing facial mask a few times a week. Then finish with your full winter skincare routine to replenish even more moisture as you sleep.
LAYER, LAYER, LAYER
This is the secret to a successful winter skincare routine: layering. Cold weather calls for layering, and not just for your OOTD (aka Outfit Of The Day – it’s okay, I had to look that up too 😉 ). Specific products in your skincare routine actually work better together and help to build on the benefits of one another.
After your oil cleansing ritual, follow these steps below to layer your products to enhance their effectiveness and finally say “see ya later” to flaky, dry, weather-beaten skin.
LAYER COMPLEXION MIST + SERUM: The best way to boost the absorption (and the benefits!) of your serum is by spritzing a hydrosol beforehand. A simple spritz of Complexion Mist after cleansing and before applying your moisturizer allows hydration to soak even more deeply into the skin and provides much needed dry skin relief.
LAYER SERUM + BEAUTY CREAM: Think of your skin-specific serum like your favorite chunky sweater: a seasonal staple. Infuse life into thirsty skin that’s dull + dehydrated on the daily. But sometimes, when it gets really cold outside, a sweater just isn’t going to cut it – that’s where your coat comes in: aka beauty cream. (Thanks for bearing with me during this wardrobe analogy! 😉 ) After applying your skin-specific serum, seal it all in with a Beauty Cream to deeply moisturize and nourish the skin. For super-sensitive or weather-beaten skin, try the Baby Balm which is rich in marshmallow root (aka nature’s hyaluronic acid) to attract moisture and protect the skin’s delicate barrier.
LAYER BEAUTY CREAM + COMPLEXION MIST: For added hydration, spritz Complexion Mist after applying Beauty Cream to lock in moisture as the last layer in your winter skincare routine!
Skin Tip: For our acne-prone friends, we encourage you to swap aggressive topical acne products and layering lots of soothing oils + herbs to help calm redness and breakouts while still strengthening the skin’s delicate barrier. Trust us, come Spring, your skin will thank us. 😉
LITTLE DETAILS
Don’t forget your eyes + lips! These little areas on the face shouldn’t be overlooked, especially this season.
Eyes: This fragile skin is the first place to reveal dehydration, sleep deprivation (hello, dark circles) + signs of aging, so it’s essential to include a vitamin-rich cream in your winter skincare routine. Even if you feel too exhausted at the end of the day to cleanse your skin and apply eye cream, staying consistent with your skincare will keep your complexion radiant and clear – no concealer needed.
Lips: Chapped lips don’t have to come with the colder months! Apply lip balm before bed and wake up to soft, buttery (and plump!) lips, even in the dead of winter.
Lip Tip: Not only do you want to keep this winter skin secret weapon on your nightstand, but keep one in your purse (and pocket and car) for hydration on the go. Swipe on your lips, dab under your eyes and nourish cracked cuticles, all with one little tube.
WINTERTIME TOOLS
Roll your way to more hydrated skin this season. Support skin health and hydration from below the surface by adding in a facial tool as the last step in your winter skincare routine! A Ridged Facial Roller or Gua Sha Stone (or both!) powerfully support the skin’s natural functions by activating the flow of lymphatic fluid, circulation and vital nutrients – plus these tools enhance the absorption of your moisturizers so you can get your glow on all winter long.
Tool Tip: If you kept your Ridged Roller or Gua Sha Stone in the fridge for the summer, try keeping it in your bathroom instead as a reminder to roll every day and to boost blood flow + warmth during the cold winter months.
BONUS TIP: BODY
To help dry, flaky skin from head to toe, it’s time to pick up the practice of dry brushing. Natural bristles combined with short, light strokes (learn how to dry brush here!) help to gently exfoliate and slough off dry, scaly skin to reveal smoother, softer skin – no harsh or abrasive exfoliants needed. A daily dry brushing ritual helps to visibly improve skin texture and prep skin to better absorb moisture. A win-win for winter skin!
Be sure to dry brush before showering (remember, warm water not hot!) and afterward, massage in a luxurious body oil while skin is still damp to drench your body with much-needed moisture.
We hope these tips help you create a seamless transition to a winter skincare routine – and a healthy, hydrated complexion! XO
Your Acne Skincare Routine Capsule: The Top Products for Acne + How to Customize Your Routine
With many different product choices, tips flooding your social media feed, and the internet promising to heal your acne, it can be hard to figure out how to heal your skin. With something so unique + personal, how do you start building your acne skincare routine?
Maybe you know some of the basics, but they don’t seem like enough. Or maybe the combinations you’ve tried just haven’t cut it.
Acne is caused by a variety of different reasons, so it’s no wonder it can be difficult to heal. But don’t give up hope! There are plenty of natural solutions for acne that really work. And here’s a secret: your acne skincare routine doesn’t need to be complicated to see results.
In fact, we’d argue simplifying your routine is MORE beneficial than throwing a million different products at your skin. So breathe a big sigh of relief!
Whether it’s hormonal, cystic, or another type of acne: Here are our top picks for building the best capsule for an acne skincare routine.
Step 1: Double Cleansing (Oil + Cleansing Bar)
If you’re new to the oil cleansing method, it can feel scary. But trust us on this one – cleansing oil is one of the best ways to balance your skin’s oil production. It’s a must for an effective acne skincare routine that heals naturally.
Cleansing Oil
Truth: Some of the magic of using cleansing oil as part of your acne skincare routine is also the aspect of facial massage. ;) We recommend spending at least 1-2 minutes massaging your face (or more if you’re feeling it).
To get the most out of this step, apply to dry skin and let the oil sink deeply into the pores as you massage. This helps pull out impurities + dissolve excess oil and makeup. The massage stimulates the lymphatic system in your body to clear out toxins + deliver nutrients and blood flow to the areas that need healing most.→ How often to do it: 1x/day in the PM hours. In the AM, you can just rinse with water before continuing your acne skincare routine. → How to pick the best oil cleanser for your skin: Our oily formula will be best if you’re prone to excess oil production and reaching for blotting sheets by noon. Normal is best for combination skin with dry patches and oil production. Dry will be best if you’re feeling dehydrated but still experiencing breakouts.
Cleansing Bar (Clarifying)
As part of your acne skincare routine, add in a double cleanse 3-5x/week. Simply finish cleansing with the Clarifying Bar after your Cleansing Oil.
We love the Clarifying Bar because it’s a powerhouse natural acne solution. It contains charcoal to gently detox the skin without stripping it. Raw honey boasts antibacterial, antimicrobial, and moisturizing properties. And essential oils purify the pores.→ How often to do it: We recommend 3-5x/week, but if you feel you need to do it every day (or after excessive sweat/exposure to bacteria), go for it. Just tune in to ensure it’s not too drying for your skin.
Tips: Check out this tutorial for oil cleansing + this double cleansing tutorial to learn the ropes and oil-cleanse like a pro.
Resources: If you’re unsure if you’re oil cleansing correctly, check out our post on oil cleansing mistakes to avoid. You’ll also find a lot of helpful information in our Oil Cleansing Q&A.
Step 2: Everything Spray
You can tell we’re biased by the name – but this spray really can do everything. (Okay, almost ;)) Here’s why we chose Everything Spray as the next step in your acne skincare routine.
While your skin needs oil in your acne skincare routine (which still might sound counterintuitive to you), it also thrives with water. A combination of water and oil supports balance in your skin. So don’t skip this step.
A facial mist primes your skin to better absorb the nutrient-dense products that follow in your acne skincare routine. It not only protects the skin’s moisture barrier, but it also keeps the skin hydrated – which is critical with natural acne solutions.
We love the Everything Spray as part of your capsule acne skincare routine because of its impressive ingredients:
Organic lavender and tea tree essential oils – calms inflammation and provides antibacterial protection against further acne formation
Witch hazel – a natural astringent that helps cleanse the skin and removes any remaining excess oil, makeup, etc. and shrinks the pores to regulate oil production
Organic apple cider vinegar – resets the skin’s pH to bring balance + improves healing
→ To heal scarring/discoloration: Swap for the Clarifying Mist. If you want your acne skincare routine to focus on healing acne and healing past scarring/discoloration, this could be a great option. It contains ingredients to help reduce scarring and discoloration. Bergamot, neroli, and aloe vera balance pH levels and tighten pores, providing many of the same effects as the Everything Spray.
→ Insider advice: Our holistic esthetician Courtney also loves layering both. :) First, apply Everything Spray on a cotton round, and then spritz the Clarifying Mist.
→ How often to do it: Apply 2x/day, in the AM and PM, as part of your acne skincare routine.
→ Tip: Layer with an extra mist after your final step to seal everything in and provide added nutrients to the skin. ;)
→ Resource: This blog will help you understand why your skin needs oil + water as part of your capsule acne skincare routine.
Step 2, done. Now let’s move on to the nutrient-dense serum you’ll want to add next.
Step 3: Clarifying Serum
After cleansing your skin + prepping it with a dose of healthy hydration-rich botanical plant waters, it’s time to incorporate a deeply penetrating clarifying serum into your acne skincare routine capsule.
Serum has a unique job. It’s a critical part of your acne skincare routine that you don’t want to miss out on. It provides more potent superfoods and plant actives for targeted acne-clearing results.
And don’t worry – similar to the concept of cleansing oils, oil-based serums are GOOD for your acne-prone skin. They continue to aid in the gentle balancing of your pores + oil production. And leaving oil on your skin won’t feel oily – promise. Our formula is designed to sink into deeper levels of the skin to give you a radiant glow – never looking greasy.
Our Clarifying Serum is perfect for your acne skincare routine capsule because it contains:
Powerful antioxidants like green tea with EGCG and prickly pear seed oil that have Vitamin C, E, and K to treat active breakouts + acne scarring.
Manuka oil (not to be confused with manuka honey) which is one of the most naturally antimicrobial, antifungal, and anti-inflammatory ingredients that exist in nature. In fact, it’s 20-30x more effective than tea tree oil in fighting bacteria and breakouts. All without disrupting the moisture levels in the skin – perfect for your acne skincare routine.
→ How to apply: Take a moment to massage the oil into the skin to activate lymphatic drainage and tension release.
→ How often to use it: Apply 2x/day – in the AM with your routine and in the PM with your full cleansing routine.
→ Tip: Only use gentle massage pressure to lightly stimulate lymphatic flow without aggravating acne.
→ Resource: Read more about the power of oils in your skincare routine.
Are you ready for the next step in your acne skincare routine? This one is meant to seal in moisture overnight – so if you’re applying in the AM, skip and move on to the following step. ;)
Step 4: Clarifying Cream (PM Only)
A rich part of your nighttime routine, we love incorporating nourishing + non-comedogenic creams in your acne skincare routine. We find that acne-prone individuals are afraid to layer in moisturizers and creams.
But rest assured, our Clarifying Cream is not going to clog pores. Your skin NEEDS extra moisture + protection at night – especially as you sleep and your skin does the most restorative healing work. And don’t worry, the texture is a lightweight, whipped goodness that easily absorbs.
In fact, our entire line of skin-specific creams is designed to provide potent nourishment through biocompatible animal fats. This means the nutrients are easily absorbed + incorporated into your body, so they get to work faster (and more efficiently).
In our Clarifying Cream, you’ll find:
Tallow + Emu oil – both derived sustainably and ethically. These healthy fats contain an impressive amount of vitamins and nutrients you won’t find in plant-based ingredients alone.
A blend of concentrated clarifying and anti-inflammatory oils – like neroli and manuka that balance oil production, calm inflammation, + repair damage.
→ How often to use it: Apply 1x/day in the PM with the other nighttime products in your acne skincare routine.
→ Tip: During winter months or in colder climates, you may find that using a clarifying cream in the morning is also helpful to prevent drying and irritation.
→ Resource: If you’re curious about tallow + how this animal fat is derived for our products, here’s a video from our founder Bethany.
Now the journey is up to you: You can stop here and repeat tomorrow. Or if you’re feeling it, keep going! Let’s cover two different “boosts” you can incorporate into your acne skincare routine for an extra dose of healing goodness.
Bonus: Boost Your Acne Skincare Routine: Clarifying Mask + Neck Flow
Using the acne skincare routine above would be more than sufficient to get you started on your skin-healing journey. But if you’re looking to add an extra boost to your routine, here are two of our favorite practices to add in!
These can be used routinely following the directions below, or you can add them in whenever you have time. Either way, your skin will thank you.
Clarifying Mask
All our masks would be a great choice, but this mask is packed with ingredients from nature proven to detoxify, brighten, and minimize breakouts. We love the kaolin clay, raw + local honey, and colloidal silver. Plus adding turmeric gives it high anti-inflammatory powers and a lovely yellow hue. Not to mention white willow bark is a natural alternative to salicylic acid – yes, please!
→ How often to use it: Apply 1-3x/wk, in the AM or PM. And our Holistic Esthetician, Courtney, says you can also spot-treat with the mask more often.
→ Tip: If you have combo skin, try a multi-masking trend. (Check out our mask trio bundle to test out all three masks.)
Lymphatic Neck Flow (Gua Sha or Facial Cupping)
Using your facial cupping set or gua sha stone, gently work on the neck to stimulate flow. Avoid active inflammation and breakouts on the face. This is an excellent way to open up pathways for more blood flow, nutrients, and detoxification for skin experiencing acne.
→ How often to use it: Practice daily for best clearing results. But any amount will benefit your skin!
→ Resource: Check out this gua sha neck flow tutorial with our holistic esthetician Courtney or her facial cupping tutorial on Instagram.
Whether you indulge in these extra steps or not, prioritizing this acne skincare routine will bring new life to inflamed, red, and stubborn breakouts.
We know it’s hard, but just be patient, and results will follow. :)
Your Acne Skincare Routine Capsule, Delivered
Healing acne can become an exhausting and long-term commitment. And truthfully, finding helpful natural acne solutions can be very daunting – especially if you’re new to the non-toxic and holistic world.
That’s why we’ve created this resource – to take off some of the pressure for making decisions + weighing options.
So if you’ve been struggling with acne and need some guided direction, give this acne skincare routine capsule a try. Plus, there are no rules – you can always adjust as you see fit – listen to your skin!
Hopefully, this provides clear information and suggestions so you can spend less time in the “trial and error” phase and more time getting back to the skin you love and feel confident in.
XO
P.S. If you’re still feeling stuck, check out our skin quiz for even more personalized suggestions.
Pin your fav blog post below:
Our Founder's 2021 Holiday Gift Guide
Our Founder’s curated gift list for everyone on your list, intentionally created with clean living and ethical manufacturing practices in mind. From the go-getter and the health-seeker to the foodie and the homebody, here’s Bethany's roundup for the best gifts that support a healthy lifestyle, no matter who you’re shopping for.
For The Go-Getter
Palo Santo Aromatherapy Oil by Primally Pure
Dry Shampoo by Primally Pure
Books
Essentialism: The Disciplined Pursuit of Less
Good to Great: Why Some Companies Make the Leap and Others Don’t
The One Thing: The Surprisingly Simple Truth Behind Extraordinary Results
Clean Coffee from Kion
Mental Performance Supplement from Qualia
Earbuds with EMF protection from Tech Wellness
The Amber Boot by ABLE
The Convertible Blazer by Vetta Capsule
The System Tote by Cuyana
For The Health-Seeker
Dry Brush Duo by Primally Pure
The Starter Kit by Primally Pure
Supplements
Quinton Saltwater Mineral Supplement from Water and Wellness
Bee Propolis Spray from Beekeeper’s Naturals
Grass-Fed Organ Complex from Paleo Valley
Ode to Tea Gift Box from Pique
Blue Light Blocking Glasses by BLUblox
The Premium Starter Kit by Branch Basics
Wifi Kill Switch from Tech Wellness
Glass Water Bottle with Silicone Sleeve by BKR
Cute Ankle or Wrist Weights by Bala
Berkey Water Filter
Portable Red Light Therapy Device by Joovv
Temperature Controlled Mattress Pad by ChiliPad
For The Socialite
Tinted Lip Balm by Primally Pure
Ridged Facial Rollers by Primally Pure
Gua Sha Stone by Primally Pure
Clay + Honey Face Masks by Primally Pure
Hydrating Hair Mask by Innersense Organic Beauty
Lumineux Non-Toxic Whitening Strips
Non-toxic makeup set by Ilia
Sundays Nail Polish
Kava Wellness Tonic (alcohol alternative)
Dyson Supersonic Hair Dryer
Sustainable Dresses by Reformation
Round Initial Disk Necklace by Kinn
For The Foodie
Beyond Organic Meat from Primal Pastures
Wild-caught seafood from Vital Choice
Always Pan (non-toxic, multi-purpose cooking pan)
Dry Farm Wines Gift Box
Paleo Condiments from Primal Kitchen Foods
Thrive Market Membership
Vitamix Blender
Instant Pot Pressure Cooker
For The Homebody
The Autumn Home Collection by Primally Pure
Palo Santo Sticks by Primally Pure
Palo Santo Aromatherapy Mist by Primally Pure
The Spa Kit by Primally Pure
Alpaca Sweater by Laude the Label
Washable Silk Sleep Mask by Lunya
Shearling Wool Slippers by Parachute
Essential Oil Diffuser
Balanced Bedroom Gift Set by Tech Wellness
Organic Terry Sweatshirt and Jogger Pants by MATE
The Blanket Scarf by Janessa Leone
For The Men In Your Life
Charcoal Deodorant by Primally Pure
Beard Oil by Primally Pure
Temperature Controlled Mug by Ember
Rambler Bottle by YETI
The Single Edge 2.0 Razor from Supply
Earbuds with EMF Protection from Tech Wellness
EMF-Free Alarm Clock
Sustainable Wool Shoes by Allbirds
The Everyday Backpack by Peak Design
The Oura Ring
Beyond Organic Meat from Primal Pastures
Traeger BBQ
For The Kiddos
Clothing
Organic Kids Clothes by Go Gently
Organic Kids Loungewear by MATE The Label
Organic Kids Underwear by Arq
Color-It-Yourself Pajamas from The Tot
Toys
Silicone Stacking Tower from The Tot
Magnetic Wood Building Tiles from The Tot
Non-Toxic Play Makeup from The Tot
The Holdie Dollhouse by Bitte
Little Surfer Balance Board from The Tot
Arc Playset from Gathre
Birch Wood Climber from The Tot
Arts & Crafts
Make-Your-Own Card Set from Tech Wellness
Christmas Coloring Posters from Meri Meri
Nativity Paper Craft Advent Calendar from Meri Meri
Non-Toxic Christmas Play Dough Set from The Tot
Arts and Crafts Library from The Tot
Kids Wellness
Kids Blue Light Blocking Glasses from BLUblox
EMF and Radiation Free Kids Headphones from Defender Shield
Kids Stainless Steel Water Bottles from Liewood
Stocking Stuffers
Lip Balm by Primally Pure
Char[coal] Deodorant (see what I did there? haha) by Primally Pure
Beard Oil Kit by Primally Pure
The Scrunchie by Girlfriend Collective
Heavenly Organics Mint Chocolate Honey Patties
Immunity Gum from Mighty Gum
Joolie’s Organic Dates 2 Pack
LMNT Electrolytes
HU Dark Chocolate Bars
Organic Underwear by Knickey
100% Grass-Fed Beef Sticks from Paleo Valley
Pin your fav blog post below: